DHR/AR Rheometer: Using the Camera
Setting Up the Camera
The DHR/AR camera panel can display images from a variety of sources: ETC viewer, Peltier web cam, SALS camera, etc. The following instructions assume that at least one camera is installed on a DHR Series or AR Series instrument, the instrument is powered on, and the camera driver has been properly installed.
In TRIOS software:
- Select View tab > Display Panels toolbar > Image.
- From the Image panel, select the Live view drop-down menu.
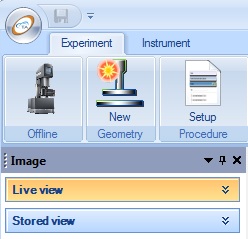
- Select the Settings checkbox to display the settings options.
- If you have more than one video capture device installed (and you have not already specified a device), Windows prompts you to Select video capture device. Highlight the device you wish to use and click OK.
- Click Configure:
- Select the Video Decoder tab. Ensure that Video Standard – PAL-B is selected.
- Select the Video Image tab. Select Flip Vertical, Flip Horizontal.
- Click OK to correctly position the image.
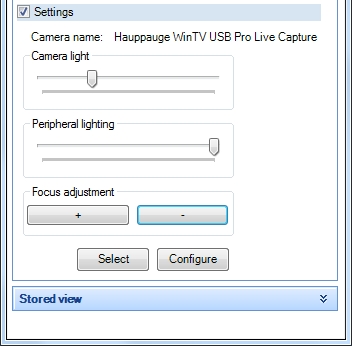
- Set the Focus adjustment by clicking + (focus in) or – (focus out). For optimum viewing quality, focus the camera out in order to view the entire sample.
- Set the Camera light and Peripheral lighting brightness using the sliders. For optimum viewing quality, ensure the lights are on a low setting. To turn the camera light off, move the Camera light and Peripheral lighting sliders all the way to the left.
- NOTE: Lighting and focus controls only apply to the ETC viewer.
Viewing and Saving the Camera Images
After properly installing and setting up the camera, you can view live images during an experiment. To save these live images, see To Save Images and follow the instructions prior to running a test.
To View the Live Camera Image
Follow the instructions below to view the live camera image during an experiment.
- Select View tab > Display Panels toolbar > Image.
- Click the Live view drop-down menu to display the camera image.
To Save Images
To save images taken by the camera during a test, follow these instructions prior to running a test:
- Select View tab > Display Panels toolbar > Image.
- Click the Live view drop-down menu to display the camera image.
- Select the Settings checkbox to display the settings options.
- If you have more than one video capture device installed (and you have not already specified a device), click Select. Highlight the device you wish to use and click OK.
- Set up the desired procedure and within the Data Acquisition options for each step, select Save Image to enable image capture for that step. For time-based tests, specify the image collection rate as well.
- NOTE: The image panel must remain open during a test for the image(s) to be captured. If desired, auto-hide the panel during the test to maximize space in TRIOS.
- NOTE: Each saved image is slightly less than about 10 KB in file size.
To View Saved Images
To view saved camera images after an experiment:
- Open the experiment data file containing the saved images.
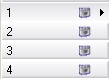
- Click on the Spreadsheet view. Camera icons appear next to the row numbers (shown below), indicating that there are saved images.
- Select View tab > Display Panels toolbar > Image (alternatively, double-click on the camera icon).
- In the Image panel, click Stored view. The saved image appears.
- Select View settings to change the image Brightness and Contrast. Use the slider bars to modify the image as desired. Click Reset to return to the default image view settings.
- To zoom, click within the image and click + and – (shown below) to zoom in and out, respectively.

To Export Saved Images
- NOTE: The Export function is also available through the right-click pop-up menu.
To export saved images:
- Open the experiment data file containing the saved images.
- Click on the Spreadsheet view. Camera icons appear next to the row numbers (shown below), indicating that there are saved images.
- Select the row of the image you wish to export. To select multiple images, hold down the CTRL key while selecting the desired rows.
- Right-click on any of the selected row numbers and select Export Image.
- Enter a file name for the exported image(s).
- By default, TRIOS uses the experiment data file name as the file name for the image.
- If exporting multiple images, TRIOS appends a chronological number to the end of each image file name.
- Select the file type and click Save.
To Copy Saved Images
To copy saved images:
- Open the experiment data file containing the saved images.
- Click on the Spreadsheet view. Camera icons appear next to the row numbers (shown below), indicating that there are saved images.
- Select the row of the image you wish to copy. To select multiple images, hold down the CTRL key while selecting the desired rows.
- Right-click on any of the selected row numbers and select Copy Image.
- You can now paste the image into any image-capable application.
- If copying multiple images, when pasted they will appear stacked vertically as one image.
See Also
Installing the Peltier Viewer Camera
